Installation Guide
Various ways to install this application, each with its pros and cons.
Table of Contents
Environment
Ensure that the web server has the URL rewrite module installed. Currently, I only provide the configuration for the rewrite module of Apache web server version 2.4 and higher. Additional configurations for other web server types will be added in the future, depending on users’ application environments.
Apache
- Apache 2.4 and above, with enabled
mod_rewritemodule. - PHP 7.3.0 and above.
Lighttpd
Lighttpd server support can be provided. This code was contributed by external developers. To improve this code, please add it to the discussion. I will regularly update this code based on the best answers in the discussion:
# Deny access to everything under `.\engine\`
$HTTP["url"] =~ "^/engine/" {
    url.access-deny = ( "" )
}

# Deny access to everything under `.\lot\`
$HTTP["url"] =~ "^/lot/" {
    url.access-deny = ( "" )
}

# Allow access to everything under `.\lot\asset\`
$HTTP["url"] =~ "^/lot/asset/" {
    url.access-allow = ( "all" )
}

# Allow access to the specified file type(s) under `.\lot\x\*\` and `.\lot\y\*\`
$HTTP["url"] =~ "^/lot/[xy]/[^/]+/[^/]*\.(a?png|css|gif|ico|jpe?g|js|svg)$" {
    url.access-allow = ( "all" )
}

# Rewrite the path to `index.php` if it’s not a file/folder
url.rewrite-if-not-file = ( "^(.*)$" => "/index.php?$1" )
Nginx
Nginx server support can be provided. This code was contributed by external developers. To improve this code, please add it to the discussion. I will regularly update this code based on the best answers in the discussion:
charset utf-8;

location = /ads.txt {
    allow all;
}

location = /favicon.ico {
    allow all;
}

# Google’s site verification file must be accessible in public!
# Replace `XXXXXXXXXXXXXXXXX` with your original file suffix
location = /googleXXXXXXXXXXXXXXXXX.html {
    allow all;
}

location = /robots.txt {
    allow all;
}

location / {
    try_files $uri $uri/ /index.php$is_args$args;
}

location ^~ /engine/ {
    deny all;
    return 403;
}

location ^~ /lot/ {
    deny all;
    return 403;
}

location ^~ /lot/asset/ {
    allow all;
}

location ^~ /lot/[xy]/[^/]+/.*?\.(css|gif|jpe?g|js|a?png|svg)$ {
    allow all;
}

location ~ /\. {
    deny all;
    return 403;
}

location ~ \.php$ {
    fastcgi_intercept_errors on;
    include fastcgi_params;
    fastcgi_param SCRIPT_FILENAME $document_root$fastcgi_script_name;
    fastcgi_pass unix:/run/php-fpm/www.sock;
}
Installation
Using Composer
This method can be used as an alternative for those of you who are used to using PHP frameworks such as Laravel and Symfony to slowly get familiar with the Mecha ecosystem. Please note that I do not guarantee full support for all available extensions and layouts, therefore they may not be easily installed or updated using Composer. For commercial extensions and layouts, it is likely that I won’t add the ability to install them via Composer.
This method has the benefit of automatically controlling the versions of the dependencies for each extension and layout. There is no need to read online documentation and upgrade information to know if the current version of the extension and/or layout you’re about to install is compatible with the existing dependencies.
One of the disadvantages of this method is that it will add junk files and folders that you can actually get rid of, because the way extensions and layouts are installed in Mecha is not the same as the way extensions and layouts are installed in other content management systems. The generated auto-loader file from the vendor folder is not mandatory in Mecha. Mecha has its own automatic extension and layout loader system.
This Composer-thing is actually a hack that makes use of the plugin’s ability to install extensions and layouts into a non-standard vendor folder structure.
Here, I assume that you are currently in the root folder of the web server. I also assume that your site’s public directory is in /srv/http. Make sure the folder is empty, or move the existing files to another place first. Don’t forget with that . at the end of the command as written in the example below, to clone the repository into the current root folder.
composer create-project mecha-cms/mecha .To install extensions and layouts, you just need to run the require command. Mecha’s Composer plugin will understand whether you want to install an extension or a layout based on the project naming convention. For example, to install a control panel feature, you can run this command. Composer will take care of the dependencies that mecha-cms/x.panel package needs to work properly:
composer require mecha-cms/x.panelUsing File
Using the installer file, you will be able to install this application in the easiest way, without the need for any additional tools. You just need to download the installer file and then follow the instructions. Here, I assume that you already have an active web server with PHP version 7.3 and above, and an Apache web server version 2.0 and above, with an active mod_rewrite module.
There is a file you need to get through this repository. This file serves as a guide to the application installation process through a HTML page interface. Its name is start.php and you need to upload it to the public folder of your web server.
What is a public folder? A public folder is a special folder on your web server that serves to display files to the public face of your web site. Typically, this folder will be named htdocs, http, public_html or www, depending on the policies and style of the web hosting provider you use. Please consult your web server service provider about where you can access the web-based file manager on your web server.
This is what it will look like if you have successfully uploaded the start.php file into the folder:
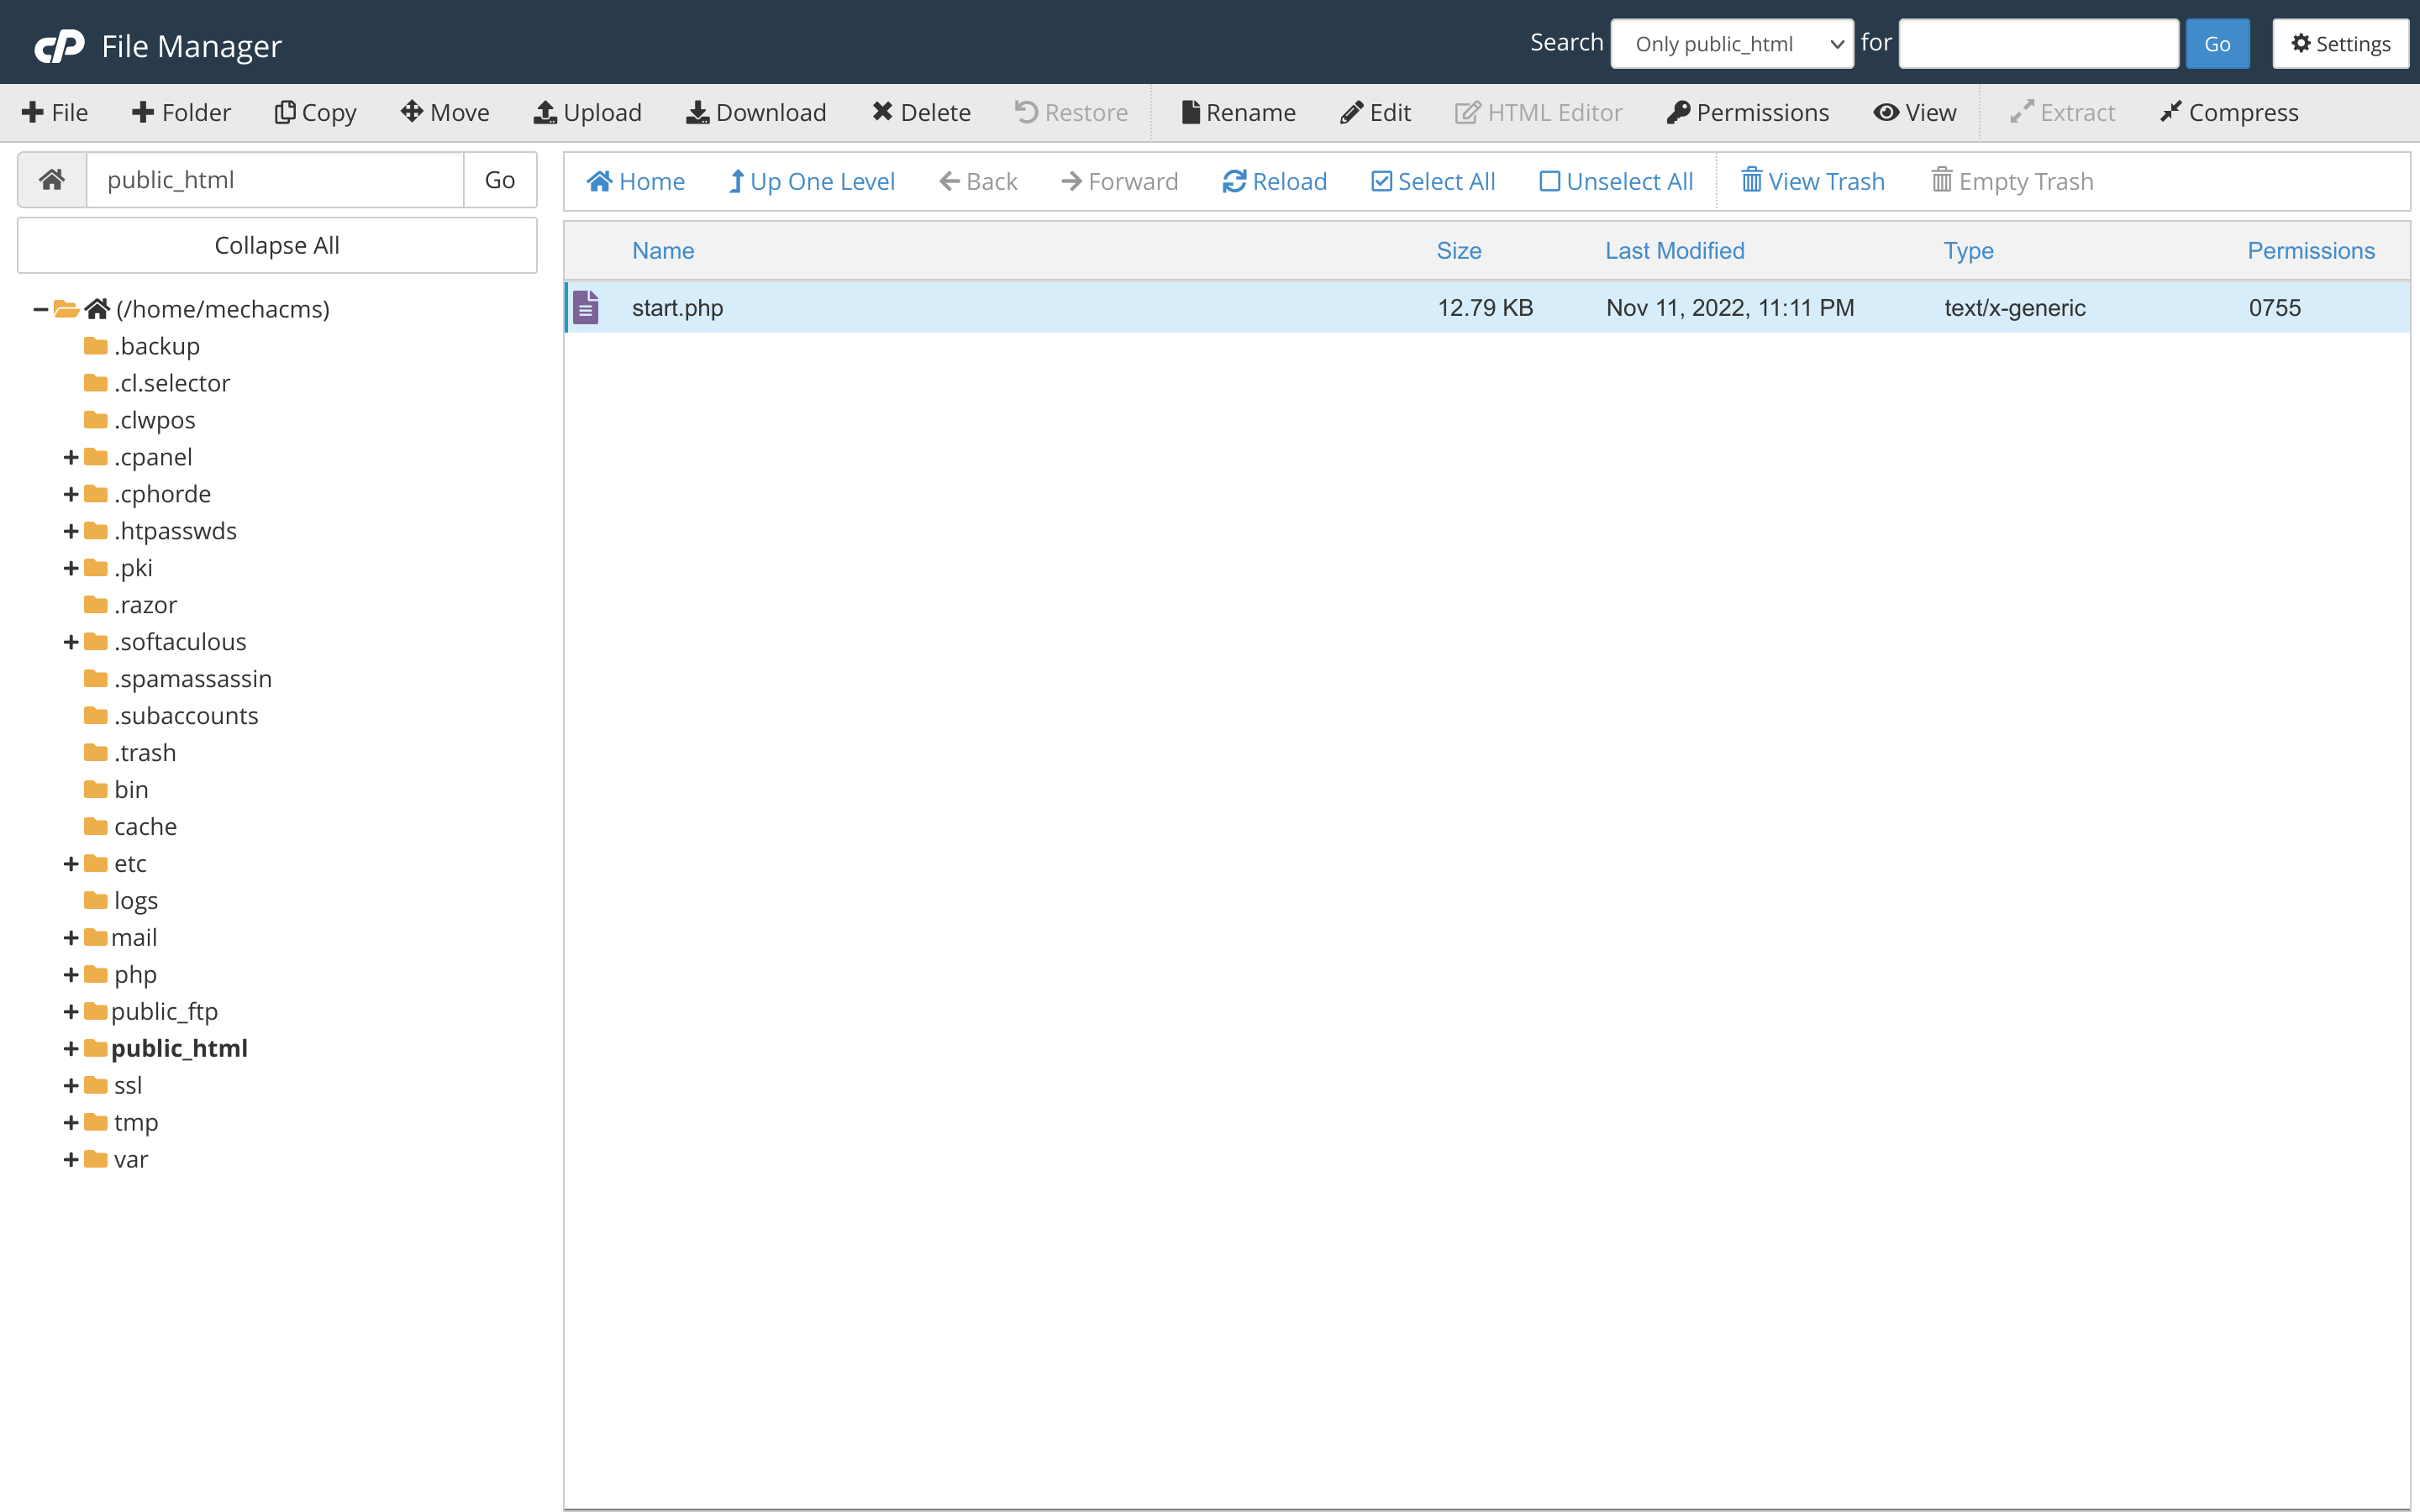
Next, you just need to visit the address http://your-site-domain.tld/start.php to begin the installation.
Using Git
You might prefer this method if you want to try out the development version of this application. It will install the last updated files anyway, regardless of the officially released stable version.
Here, I assume that you are currently in the root folder of the web server. I also assume that your site’s public directory is in /srv/http. Make sure the folder is empty, or move the existing files to another place first. Don’t forget with that . at the end of the command as written in the example below, to clone the repository into the current root folder.
git clone https://github.com/mecha-cms/mecha.git --depth 1 .Then you will need to run this command to clone the sub-modules to the right folder location:
git submodule update --init --recursiveTo install an extension, you need to do it manually by cloning the repository into the specified folder as a sub-module. It’s actually not much different as when you try to manually install an extension:
git submodule add https://github.com/mecha-cms/x.art.git --depth 1 lot/x/artMake sure that you have installed all the dependencies required by the extension you want to install. For example, to install a Panel extension, you can’t simply clone the mecha-cms/x.panel repository and then stop there. Before that, you also need to clone all of the repositories required by Panel i.e. mecha-cms/x.alert and mecha-cms/x.user extensions.
git submodule add https://github.com/mecha-cms/x.alert.git --depth 1 lot/x/alert
git submodule add https://github.com/mecha-cms/x.user.git --depth 1 lot/x/user
git submodule add https://github.com/mecha-cms/x.panel.git --depth 1 lot/x/panel
Using Package
Although this method may feel more complicated at first and can potentially lead to procrastination, it can be beneficial in the long run in situations where the user interface features of the content management system cannot fix errors.
Additionally, this method can help you recognize how files and folders are structured and how the system works, so it will be easier for you to develop this content management system further.
- Download the core application package from the home page.
- Upload Mecha through your FTP/SFTP to the public folder/directory 1 on your site, then extract it!
- Take a look on the available extensions and layouts that you might be interested.
- Upload your extension files to
.\lot\xand your layout files to.\lot\y. They’re auto-loaded. Special case for layout, there must be only oneindex.phpfile that can be active. When you upload a new folder layout into the.\lot\yfolder, and you want to activate it, make sure that the layout folder you want to activate has anindex.phpfile, and then change theindex.phpfiles in other layout folders with a different name to prevent it from loading 2. - Read on how to add pages and tags. Learn on how to create pages from the author by looking at the source code.
- Install Panel extension if you are stuck by doing everything manually. You always have the full control to remove this extension without having to worry that your site will stop running after doing so.
Coding Style Guide
My coding preferences on this project you must follow to be able to contribute.
Constant
Core application constants.
Extension
Adds features to the core application.
Files
File and folder structure.
Form
Form data evaluation.
Function
Core application functions.
Hook
List of the core hooks and what they do.
Layout
Adds a front view to present the data.
Application Life Span
Processes that occur starting from the first time you request a page until all response body is successfully rendered to you.
Object
Core application objects.
Installation Guide
Various ways to install this application, each with its pros and cons.
Variable
Core application variables.