Updating Mecha Manually
This is just a visualization for my previous article here.
Table of Contents
- Step 1: Create a Site Copy
- Step 2: Create a Temporary Folder
- Step 3: Install a Fresh Mecha Package
- Step 4: Moving the Static Files
- Step 5: Make Sure That the Site is Running
- Step 6: Layout and Extensions
- Step 7: Double Check the 5th Step
- Step 8: Delete All Files in the Parent Folder
- Step 9: Restore the File Locations
- Step 10: Delete the Temporary Folder
- Step 11: Upload the Site
TODO: Update the image.
Currently, Mecha version 2.x.x is still in active development, so it is normal when you want to see what’s new by updating your Mecha site multiple times. There will be a time when you get to see that everything is broken by your own hand. Common practices like copying and pasting new files to overwrite the old files aren’t safe because pasting will only override the currently available files, but doesn’t know what files need to be deleted. In this tutorial, I will explain step by step how to update your Mecha site safely with better visualizations.
Step 1: Create a Site Copy
Before doing anything, make sure that you have created a local copy of your site, either as its normal files and folders or as a package. Save it somewhere outside the working directory!
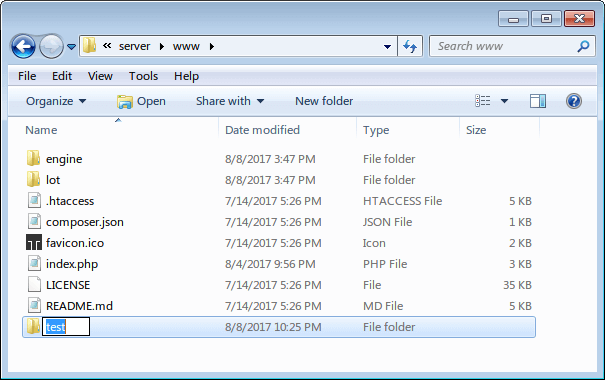
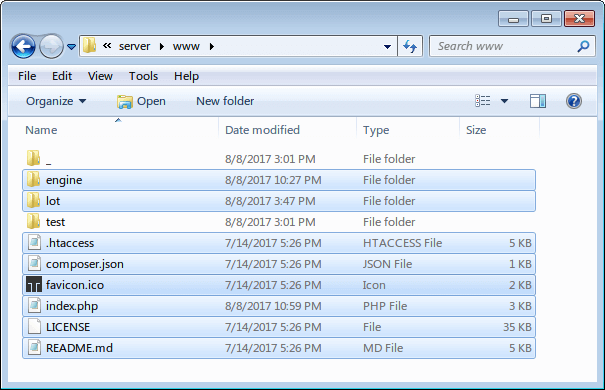
Step 2: Create a Temporary Folder
Create a temporary folder in the root folder of your Mecha site then name it as you like. Let’s say it test:
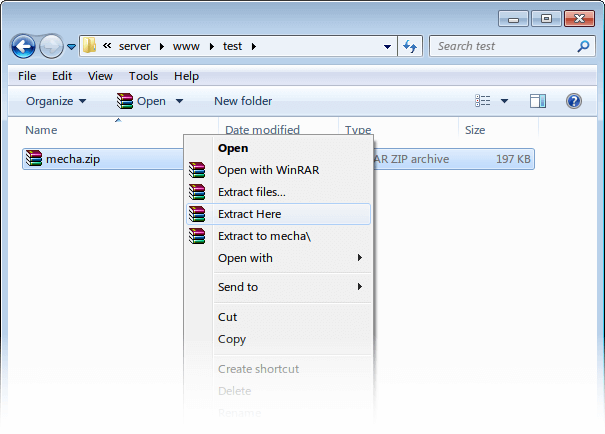
Step 3: Install a Fresh Mecha Package
Download the package from here then put it in the test folder. Extract it!
Step 4: Moving the Static Files
Now go to the lot folder of the parent folder then select all folders that contain static files, including the state folder. Copy or cut them all then paste in .\srv\http\test\lot:

Note: You may delete the page folder first, which contains some default pages as the site example.
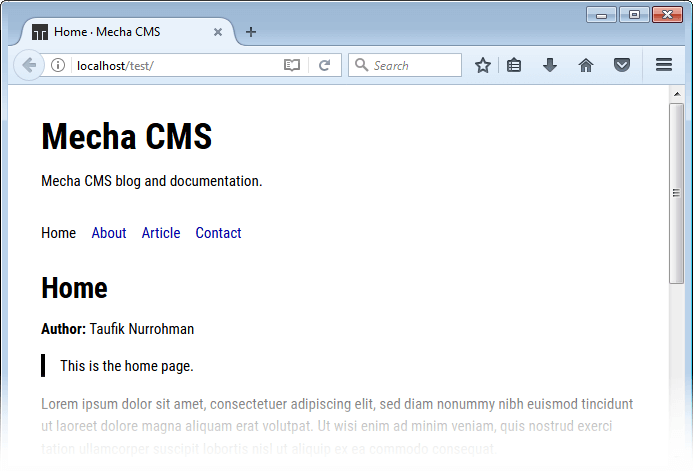
Step 5: Make Sure That the Site is Running
Now visit http://127.0.0.1/test to make sure that the site is visible as expected even without any custom extensions at all:
Step 6: Layout and Extensions
Everything is OK. You can start installing the previous shields and extensions that is located in the parent folder. But it is a good practice to install the fresh version of them instead of moving the previous shields and extensions one by one.
Step 7: Double Check the 5th Step
Double check the 5th step to make sure that everything is OK.
You may need to configure back the skins and extensions configuration value to match with the previous configuration value. Most of them are stored in:
.\lot\shield\:name\state.php.\lot\x\:name\state.php
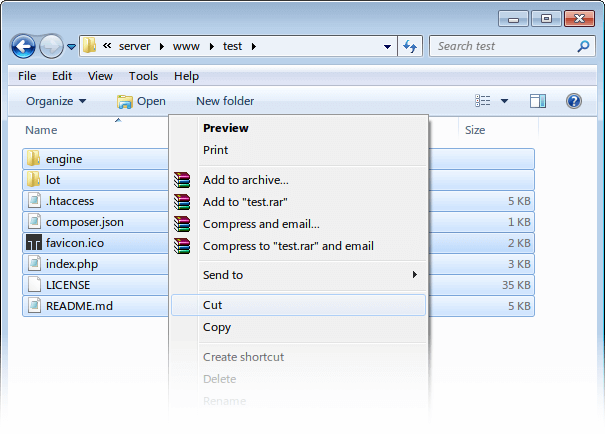
Step 8: Delete All Files in the Parent Folder
Delete or move all files in the parent folder (except the test folder) to a new folder, just in case:

Step 9: Restore the File Locations
Move all files that are now placed in the test folder to its parent folder:
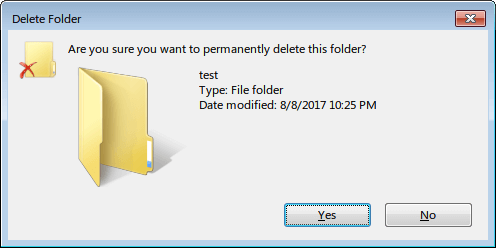
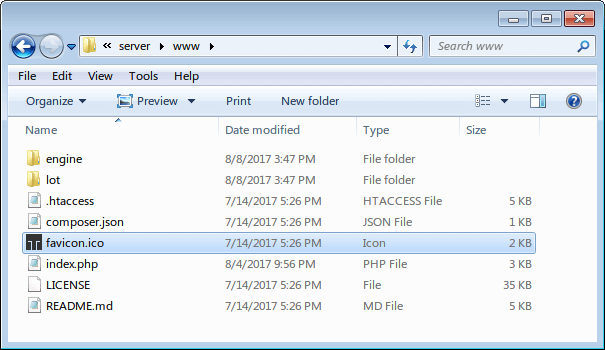
Step 10: Delete the Temporary Folder
You can now delete the test folder!
So that you will get only this:
Step 11: Upload the Site
You can now pack the updated site then upload it to the web server. There are some things to be concerned:
- The best way to update the online site is by deleting the entire site and then replacing it with the new one instead of overwriting the site files.
- Some site data like comments,
polls, and views are mostly generated by your visitors. Remember that! Make sure you don’t make a mistake by deleting them!