Reinventing the Google Fonts API
Making web fonts loader API like how Google Fonts does.
Table of Contents

Google Fonts has a very simple yet effective web font loading system. It uses a base URL with some parameters that allows you to change the response generated through that parameter. In this tutorial, we will discuss about how to create a copy of the Google Fonts API using the existing features of Mecha. But before that, I will first explain about how Google Fonts API works.
Syntax
The syntax is very easy to understand. You write the base URL then you add a family URL parameter with the value of the desired font family name. Calling a font family name without any additional parameters will load the font file with its default weight:
https://fonts.googleapis.com/css?family=RobotoThe following is the response text generated (simplified):
/* Regular */
@font-face {
  font-family: 'Roboto';
  font-style: normal;
  font-weight: 400;
  src: url('KFOmCnqEu92Fr1Mu4mxK.woff') format('woff');
}
Google Fonts API provides the regular version of the requested fonts by default. To request other styles or weights, append a colon to the name of the font, followed by a list of styles or weights separated by commas. By setting the font weight after the font family, it will load the font file with the specified weight if available.
In general, font weights are categorized as follows:
| Weight | Description |
|---|---|
100 | Thin |
300 | Light |
400 | Regular (Normal) |
500 | Medium |
700 | Bold |
900 | Black |
The following is an example of how to load Google’s fonts with weight of 400 and 700:
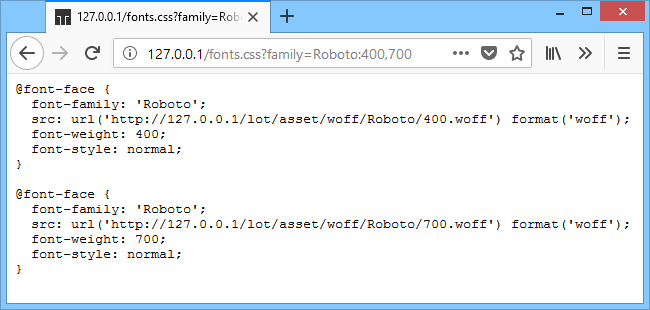
https://fonts.googleapis.com/css?family=Roboto:400,700Which will produce the following response body:
/* Regular */
@font-face {
  font-family: 'Roboto';
  font-style: normal;
  font-weight: 400;
  src: url('KFOmCnqEu92Fr1Mu4mxK.woff') format('woff');
}
/* Bold */
@font-face {
  font-family: 'Roboto';
  font-style: normal;
  font-weight: 700;
  src: url('KFOlCnqEu92Fr1MmWUlfBBc4.woff') format('woff');
}
By adding the letter i at the end of the font weight, it will load the italic version of each font weight if available:
https://fonts.googleapis.com/css?family=Roboto:400,700,400i,700iThe resulting response body is a series of @font-face rules using Roboto as the font family with its normal, italic, bold and bold-italic version:
/* Regular */
@font-face {
  font-family: 'Roboto';
  font-style: normal;
  font-weight: 400;
  src: url('KFOmCnqEu92Fr1Mu4mxK.woff') format('woff');
}
/* Italic */
@font-face {
  font-family: 'Roboto';
  font-style: italic;
  font-weight: 400;
  src: url('KFOkCnqEu92Fr1Mu51xIIzI.woff') format('woff');
}
/* Bold */
@font-face {
  font-family: 'Roboto';
  font-style: normal;
  font-weight: 700;
  src: url('KFOlCnqEu92Fr1MmWUlfBBc4.woff') format('woff');
}
/* Bold-Italic */
@font-face {
  font-family: 'Roboto';
  font-style: italic;
  font-weight: 700;
  src: url('KFOjCnqEu92Fr1Mu51TzBic6CsQ.woff') format('woff');
}
You can even load multiple font families at once by separating the family parameter values using pipe character:
https://fonts.googleapis.com/css?family=Roboto|Open+SansThe resulting response body would be something like this:
/* Roboto: 400 */
@font-face {
  font-family: 'Roboto';
  font-style: normal;
  font-weight: 400;
  src: url('KFOmCnqEu92Fr1Mu4mxK.woff') format('woff');
}
/* Open Sans: 400 */
@font-face {
  font-family: 'Open Sans';
  font-style: normal;
  font-weight: 400;
  src: url('mem8YaGs126MiZpBA-UFVZ0b.woff') format('woff');
}
You can visit the official documentation page about the usage of Google Fonts API here.
Now let’s try to create our own web font loading system using Mecha!
Route
First, we need to determine our base URL using the route. Here is a good example to get started:
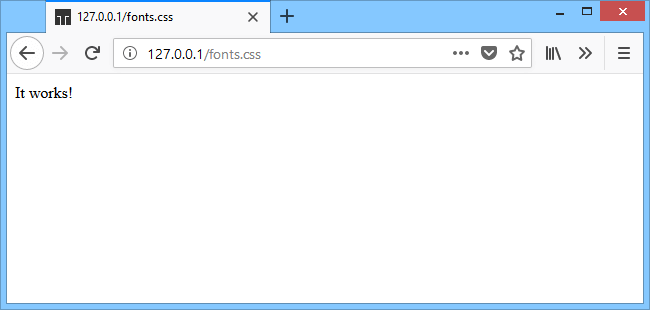
Route::set('fonts.css', function () {
    $this->content('It works!');
});
Add the code snippet above to the index.php file of your layout, then visit http://127.0.0.1/fonts.css (assuming you are in local mode), you should get a result like this:
From here you should realize that if you change the ‘It works!’ text with some CSS code, then you will be able to use that URL as a dynamic CSS file, so you can load the CSS file like this:
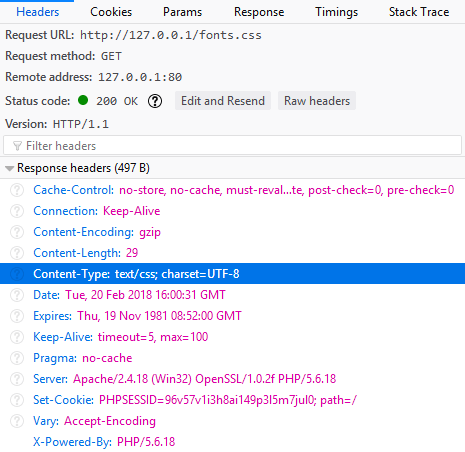
<link href="http://127.0.0.1/fonts.css" rel="stylesheet">But it will not work because the MIME type of the file is still set to text/html:

MIME
To make the CSS code work, you will need to specify the appropriate MIME type for the CSS file, that is text/css.
Route::set('fonts.css', function () {
    // Set proper MIME type for CSS file
    $this->type('text/css');
    // $this->content('It works!');
    // Generate CSS code that will set a random color to the `<body>` text
    $this->content('body{color:#' . substr(md5($_SERVER['REQUEST_TIME']), 0, 6) . '}');
});
With the dynamic CSS code above, you should see that the text color of the page will change when this dynamic file is rendered each time the page is reloaded. Now let’s go to the next step!
File Structure
Make sure that you have the font files with varying weight, then place them into .\lot\asset\woff\:font where :font is the font family name that you have set to the parameter URL. In this case, I demonstrate it using fonts named Roboto and Open Sans.
.\
└── lot\
    └── asset\
        └── woff\
            ├── Roboto\
            │   ├── 400.woff
            │   ├── 400i.woff
            │   ├── 700.woff
            │   └── 700i.woff
            ├── Open Sans\
            │   ├── 400.woff
            │   ├── 400i.woff
            │   ├── 700.woff
            │   └── 700i.woff
            └── …
Now let’s get back to the route. As I’ve said before, the Google Fonts API allows you to load multiple font families at once by separating them using pipe character. Here, we assume that the font family name is set to more than one in the family parameter:
Route::set('fonts.css', function () {
    // Set proper MIME type for CSS file
    $this->type('text/css');
    // Example: `?family=Roboto|Open+Sans`
    if ($fonts = Get::get('family')) {
        $out = ""; // Prepare the output…
        // Example: `Roboto:400,700,400i,700i|Open+Sans:400,700,400i,700i`
        foreach (explode('|', $fonts) as $font) {
            // Do something with `$font`…
        }
    }
    $this->content("");
});
In the loop above, we should have each font family name stored in variable $font. Now, assume that each font family is followed by some custom weight and style. If there aren’t any custom weight and style specified in the font family name, then we assume its value to be 400:
Route::set('fonts.css', function () {
    // Set proper MIME type for CSS file
    $this->type('text/css');
    // Example: `?family=Roboto|Open+Sans`
    if ($fonts = Get::get('family')) {
        $out = ""; // Prepare the output…
        // Example: `Roboto:400,700,400i,700i|Open+Sans:400,700,400i,700i`
        foreach (explode('|', $fonts) as $font) {
            // `$parts[0]` is `Roboto` and `$parts[1]` is `400,700,400i,700i`
            $parts = explode(':', $font, 2);
            // `Open+Sans` → `Open Sans`
            $parts[0] = strtr($parts[0], '+', ' ');
            // Font weight(s) aren’t defined, set to its default weight → `400`
            if (empty($parts[1])) {
                $parts[1] = '400';
            }
        }
    }
    $this->content("");
});
Now, assume that the existing style is set to more than one. All of the font files’ name that we have stored in the asset folder already followed the proper font weight and font style code, so we can easily check whether the font file is present or not before loading it:
Route::set('fonts.css', function () {
    // Set proper MIME type for CSS file
    $this->type('text/css');
    // Example: `?family=Roboto|Open+Sans`
    if ($fonts = Get::get('family')) {
        $out = ""; // Prepare the output…
        // Example: `Roboto:400,700,400i,700i|Open+Sans:400,700,400i,700i`
        foreach (explode('|', $fonts) as $font) {
            // `$parts[0]` is `Roboto` and `$parts[1]` is `400,700,400i,700i`
            $parts = explode(':', $font, 2);
            // `Open+Sans` → `Open Sans`
            $parts[0] = strtr($parts[0], '+', ' ');
            // Font weight(s) aren’t defined, set to its default weight → `400`
            if (empty($parts[1])) {
                $parts[1] = '400';
            }
            // Loop all the weight of the font specified in `$parts[1]`…
            foreach (explode(',', $parts[1]) as $weight) {
                // Check the existence of the file in `.\lot\asset\woff\Roboto`; e.g. `400.woff`
                if (!$file = File::exist(LOT . DS . 'asset' . DS . 'woff' . DS . $parts[0] . DS . $weight . '.woff')) {
                    continue; // File does not exist, skip!
                }
            }
        }
    }
    exit;
});
The last step is to create a @font-face rules based on the existing data, then output the result as plain text:
Route::set('fonts.css', function () {
    // Set proper MIME type for CSS file
    $this->type('text/css');
    // Example: `?family=Roboto|Open+Sans`
    if ($fonts = Get::get('family')) {
        $out = ""; // Prepare the output…
        // Example: `Roboto:400,700,400i,700i|Open+Sans:400,700,400i,700i`
        foreach (explode('|', $fonts) as $font) {
            // `$parts[0]` is `Roboto` and `$parts[1]` is `400,700,400i,700i`
            $parts = explode(':', $font, 2);
            // `Open+Sans` → `Open Sans`
            $parts[0] = strtr($parts[0], '+', ' ');
            // Font weight(s) aren’t defined, set to its default weight → `400`
            if (empty($parts[1])) {
                $parts[1] = '400';
            }
            // Loop all the weight of the font specified in `$parts[1]`…
            foreach (explode(',', $parts[1]) as $weight) {
                // Check the existence of the file in `.\lot\asset\woff\Roboto`; e.g. `400.woff`
                if (!$file = File::exist(LOT . DS . 'asset' . DS . 'woff' . DS . $parts[0] . DS . $weight . '.woff')) {
                    continue; // File does not exist, skip!
                }
                $style = 'normal'; // Set default `font-style` value
                // Example: `400i`
                if ('i' === substr($weight, -1)) {
                    $style = 'italic'; // Set `font-style` value to `italic`
                    $weight = substr($weight, 0, -1); // Remove the letter `i` from the weight
                }
                // Generate the `@font-face` rule(s)…
                $out .= "\n\n@font-face {\n";
                $out .= "  font-family: '" . $parts[0] . "';\n";
                $out .= "  src: url('" . To::URL($file) . "') format('woff');\n";
                $out .= "  font-weight: " . $weight . ";\n";
                $out .= "  font-style: " . $style . ";\n";
                $out .= "}";
            }
        }
        // Output the result and remove the first two line-break of the `@font-face`
        $this->content(substr($out, 2));
    }
    // Add error 404 message maybe?
    $this->status(404);
    $this->content('/* Fonts not found. */');
});
Now try accessing the previous dynamic CSS file with different URL parameter value to load the font file as desired!
This is just an example of how to use the hidden features of Mecha, and also to show that Mecha features are very likely to be developed towards wider cases because of its mechanism that is very possible to be manipulated without having to change or modify the default features of the core. Hopefully, this tutorial can inspire future developers to create something interesting with Mecha!
1 Comment
Dwi
Saya harap kode ini diperbarui untuk mecha versi terbaru, karena sudah tidak sesuai, dan menimbulkan error